
枯木逢春-我于北京

1690 字
8 分钟
Markdown编辑器之Typora
1 软件及插件下载
-
Typora软件(我的网盘分享直接下载使用)
- 我的是 1.95 版本,更新的破解版本好像有 bug?
- 对 Typora破解的讨论
-
两个强大的插件
- typora_plugin
- typora-community-plugin(还没有使用过)
2 Typora 编辑器的使用学习(持续更新)
3 关于自动编号
在使用 typora 的时候,没有自动编号,每一级标题要手动编号,比较累。之前有找过修改主题的 CSS 以及下面的插件来实现自动编号的,但是只是个样式而已,没有真正的编号。冲浪发现有使用脚本进行编写的。参考链接1 参考链接2
-
编写 Java 脚本,读取 MD 文件的内容,并在每个标题之前添加标题序号
-
大致思路:
- 每一级标题都有自己的计数器,由于一级标题不参与编号,从二级标题开始算起,Typora 最多支持六级标题,我们用一个长度为 5 的一维数组代表 2~6 级标题计数器
- 每读取一行,便判断此行是否为标题行,如果是标题行,则为当前标题添加标题序号
- 标题计数器初始默认值为 0 ,每次用的时候便执行 += 1 操作
-
代码部分
public class TitleAutoNumbering {public static void main(String[] args) {// MD 文件位置String destMdFilePath;// 从命令行读取 MD 文件位置,否则使用默认值if (args == null || args.length == 0) {destMdFilePath = "C:\\Users\\Heygo\\Desktop\\Typora + PicGo + Aliyun OSS + CSDN.md";} else {destMdFilePath = args[0];}// 执行标题自动编号doTitleAutoNumbering(destMdFilePath);}/*** 执行标题自动编号** @param destMdFilePath MD 文件路径*/private static void doTitleAutoNumbering(String destMdFilePath) {// 获取标题自动编号的MD文件内容String mdFileContent = getAutoTitledMdContent(destMdFilePath);// 执行保存(覆盖原文件)SaveMdContentToFile(destMdFilePath, mdFileContent);}/*** 获取标题自动编号的MD文件内容** @param destMdFilePath MD 文件路径* @return*/private static String getAutoTitledMdContent(String destMdFilePath) {// 如果不是 MD 文件,滚蛋Boolean isMdFile = destMdFilePath.endsWith(".md");if (!isMdFile) {return "";}// 标题编号/*标题编号规则:- 一级标题为文章的题目,不对一级标题编号- 二级、三级、四级标题需要级联编号- 五级、六级标题无需级联编号,只需看上一级标题的脸色,递增即可*/Integer[] titleNumber = new Integer[]{0, 0, 0, 0, 0};// 存储md文件内容StringBuilder sb = new StringBuilder();// 当前行内容String curLine;// 装饰者模式:FileReader无法一行一行读取,所以使用BufferedReader装饰FileReadertry (FileReader fr = new FileReader(destMdFilePath);BufferedReader br = new BufferedReader(fr);) {// 当前行有内容while ((curLine = br.readLine()) != null) {// 判断是否为标题行,如果是标题,是几级标题Integer curTitleLevel = calcTitleLevel(curLine);if (curTitleLevel != -1) {// 插入标题序号curLine = insertTitleNumber(curLine, titleNumber);// 重新计算标题计数器RecalcTitleCounter(curTitleLevel, titleNumber);}// 向缓冲区中追加内容sb.append(curLine + "\r\n");}// 返回 MD 文件内容return sb.toString();} catch (IOException e) {e.printStackTrace();// 失败返回空字符串return "";}}/*** 计算当前标题等级** @param curLine 当前行的内容* @return -1 :非标题行;大于等于 2 的正数:当前行的标题等级*/private static Integer calcTitleLevel(String curLine) {// 由于一级标题无需编号,所以从二级标题开始判断boolean isTitle = curLine.startsWith("##");if (!isTitle) {// 返回 -1 表示非标题行return -1;}// 现在来看看是几级标题Integer titleLevel = curLine.indexOf(" ");return titleLevel;}/*** 重新计算标题计数器的值** @param titleLevel 当前行的标题等级* @param titleNumber 标题计数器*/private static void RecalcTitleCounter(Integer titleLevel, Integer[] titleNumber) {// 二级标题更新时,三级及三级以下的标题序号重置为 0Integer startIndex = titleLevel - 1;for (int i = startIndex; i < titleNumber.length; i++) {titleNumber[i] = 0;}}/*** 向标题行中插入标题序号** @param curLine 当前行内容* @param titleNumber 标题计数器* @return*/private static String insertTitleNumber(String curLine, Integer[] titleNumber) {// 标题等级(以空格分隔的前提是 Typora 开启严格模式)Integer titleLevel = curLine.indexOf(" ");// 标题等级部分String titleLevelStr = curLine.substring(0, titleLevel);// 标题内容部分String titleContent = curLine.substring(titleLevel + 1);// 先去除之前的编号titleContent = RemovePreviousTitleNumber(titleContent);// 标题等级递增Integer titleIndex = titleLevel - 2;titleNumber[titleIndex] += 1;// 标题序号String titleNumberStr = "";switch (titleLevel) {case 2:titleNumberStr = titleNumber[0].toString();break;case 3:titleNumberStr = titleNumber[0].toString() + "." + titleNumber[1];break;case 4:titleNumberStr = titleNumber[0].toString() + "." + titleNumber[1] + "." + titleNumber[2];break;case 5:titleNumberStr = titleNumber[3].toString();break;case 6:titleNumberStr = titleNumber[4].toString() + " ) ";break;}titleNumberStr += "、";// 插入标题序号titleContent = titleNumberStr + titleContent;System.out.println("已增加标题序号:" + titleContent);// 返回带序号的标题curLine = titleLevelStr + " " + titleContent;return curLine;}/*** 去除之前标题的编号* @param titleContent 标题内容* @return 去除标题编号之后的标题内容*/private static String RemovePreviousTitleNumber(String titleContent) {// 寻找标题中的 、 字符Integer index = titleContent.indexOf("、");if (index > 0 && index < 6) {// 之前已经进行过标号return titleContent.substring(index + 1);} else {// 之前未进行过标号,直接返回return titleContent;}}/*** 保存MD文件** @param destMdFilePath MD文件路径* @param mdFileContent MD文件内容*/public static void SaveMdContentToFile(String destMdFilePath, String mdFileContent) {// 不保存空文件if (mdFileContent == null || mdFileContent == "") {return;}// 执行保存try (FileWriter fw = new FileWriter(destMdFilePath)) {fw.write(mdFileContent);} catch (IOException e) {e.printStackTrace();}}}
typora_plugin 插件的使用(持续更新)
1 安装与启动
- 下载 插件源码的压缩包,并解压
- 进入 Typora 安装路径,找到包含
window.html的文件夹 A- 正式版 Typora,路径为
./resources/window.html - 免费版 Typora,路径为
./resources/app/window.html
- 正式版 Typora,路径为
- 将解压得到的 plugin 文件夹粘贴进文件夹 A 下
- 进入文件夹
A/plugin/bin/- Windows 系统:双击运行
install_windows_amd_x64.exe,如果看到下图,说明安装成功 - Linux 系统:以管理员运行
install_linux.sh,如果看到下图,说明安装成功
- Windows 系统:双击运行
- 验证:重启 Typora,在正文区域点击鼠标右键,弹出右键菜单栏,如果能看到
常用插件栏目,说明一切顺利
2 我的使用理解
1.自动编号
这个插件的自动编号只是在 Typora 中显示和导出才生效,没有真正的修改编号
- 虽然不用,但是还是在这里备份一下我对这个插件自动编号的修改。能让编号呈现(1)、(2)的样式
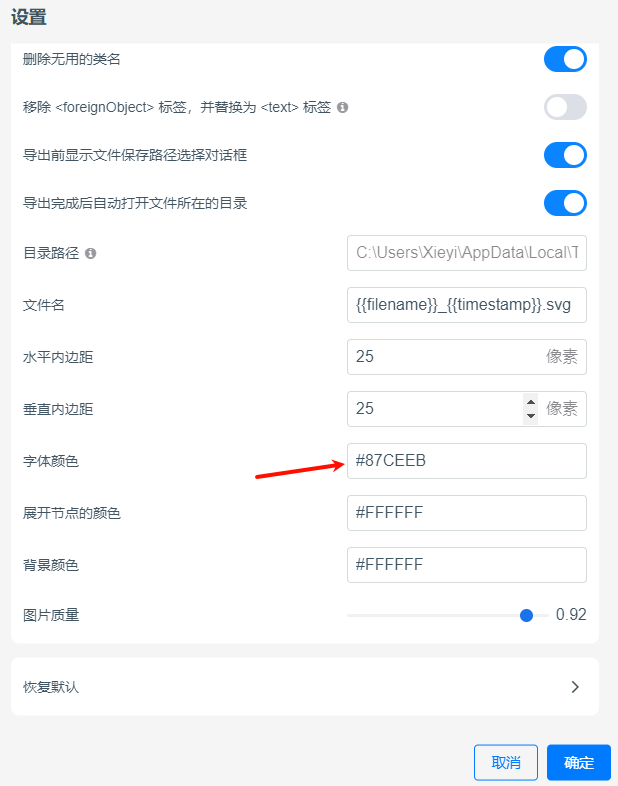
{"name": "Layout::Decimal-H2","selected": true,"layout": {"content-h1": "#","content-h2": "{c2}. ","content-h3": "({c3})",//修改了这里"content-h4": "{c4:di}","content-h5": "{c5:ci} ","content-h6": "","outline-h1": "#","outline-h2": "{o2}. ","outline-h3": "({o3} )",//修改了这里"outline-h4": "{o4:di} ","outline-h5": "{o5:ci} ","outline-h6": "","toc-h1": "#","toc-h2": "{t2}. ","toc-h3": "({t3}) ",//修改了这里"toc-h4": "{t4:di} ","toc-h5": "{t5:ci} ","toc-h6": "","table": "Table {t}","image": "Image {i}","fence": "Fence {f}"}2. 思维导图的配置
- 修改配置,参考选择颜色代码
2.1 typora-community-plugin 插件的使用(等我使用后再更新)
Markdown编辑器之Typora
https://blog.fuxieyi.top/posts/markdown编辑器之typora/